Spring Security: Exception Handling
In the previous post, I explained how authorization mechanism works in Spring Security according to successful scenario. In this article, I will explain what happens in case of authorization rejection, how we handle this scenario and return response back to user.
Authentication and authorization are very important steps when you implement secure application. However, client can make unauthenticated or not authorized request to a resource. In this case, you should force your client to provide credentials in order to access the resource. This can be done by redirecting your client to login page in user interface or informing about the situation in API response.
First, Let's see access denied scenario.
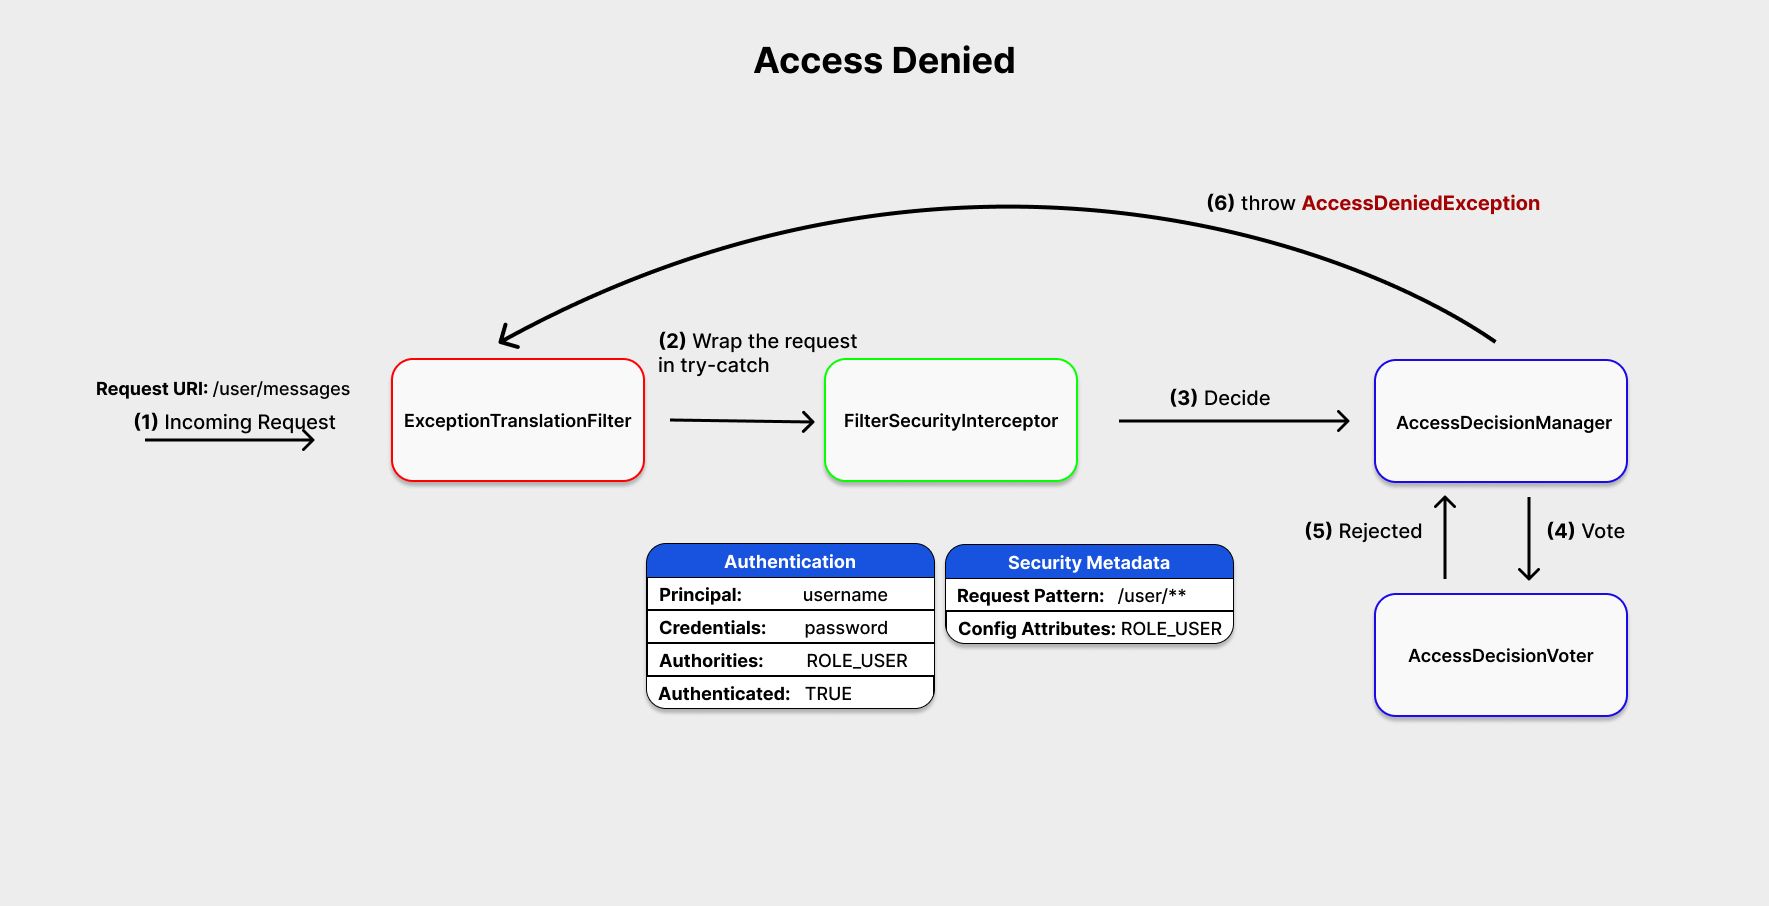
- Incoming request hits
ExceptionTranslationFilterclass. FilterSecurityInterceptoris the last filter class inFilterChain, which is responsible for authorization check. However, It is wrapped byExceptionTranslationFilterin order to catch access denied exceptions.FilterSecurityInterceptorpasses credentials and security metadata for decision.AccessDecisionManagerasks for decision.AccessDecisionVoterrejects incoming request to access given resource.AccessDeniedExceptionis thrown, soExceptionTranslationFiltercan catch it.
In case of rejection, you want to let client know why this happened. Spring Security provides built in solution for this case. Here you can see how ExceptionTranslationFilter behaves in such scenario.
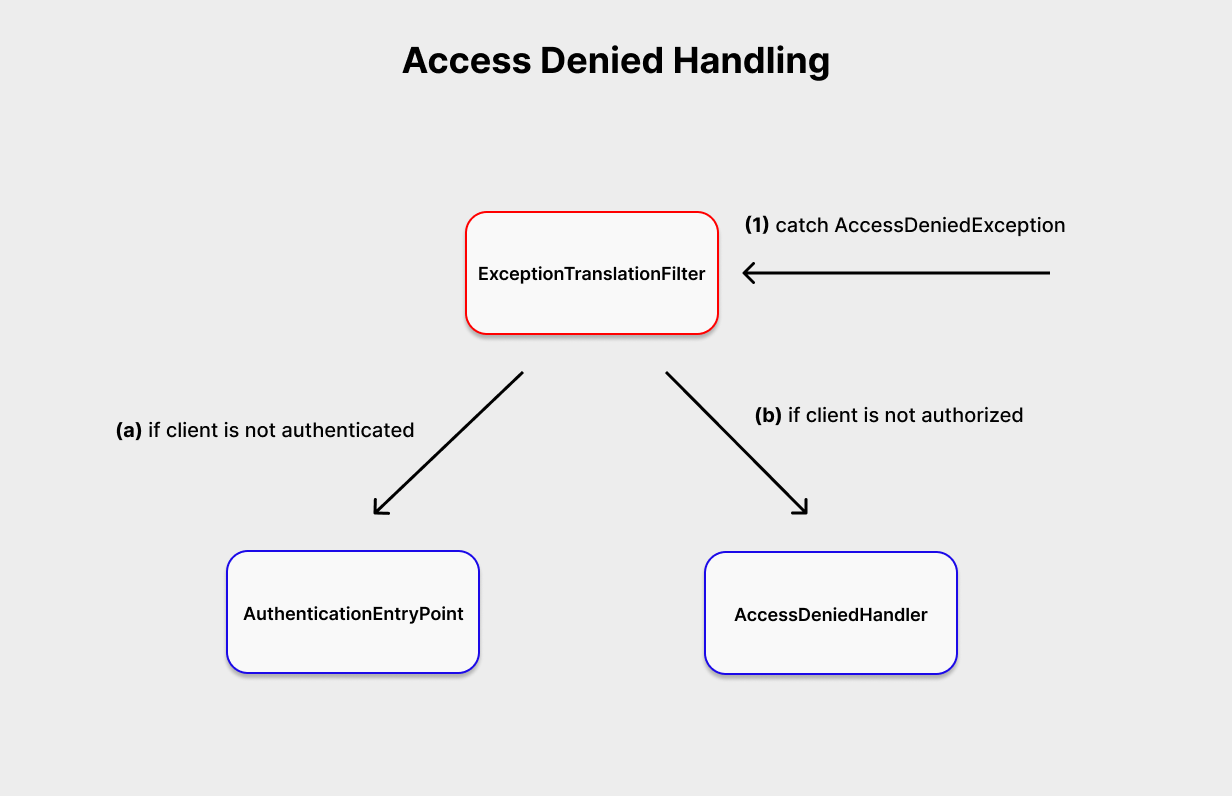
1. ExceptionTranslationFilter catches AccessDeniedException.
Then, flow will continue based on these if clauses.
a) If exception is thrown because client is not authenticated, then AuthenticationEntryPoint will be called.
b) If exception is thrown because client is not authorized for given resource, then AccessDeniedHandler will be called.
Okay, let's go one by one.
What is AuthenticationEntryPoint?
AuthenticationEntryPoint is an interface in Spring Security. According to official documentation, AuthenticationEntryPoint is used to send an HTTP response that requests credentials from a client.
In simple words, client needs to authenticate to access given resource.
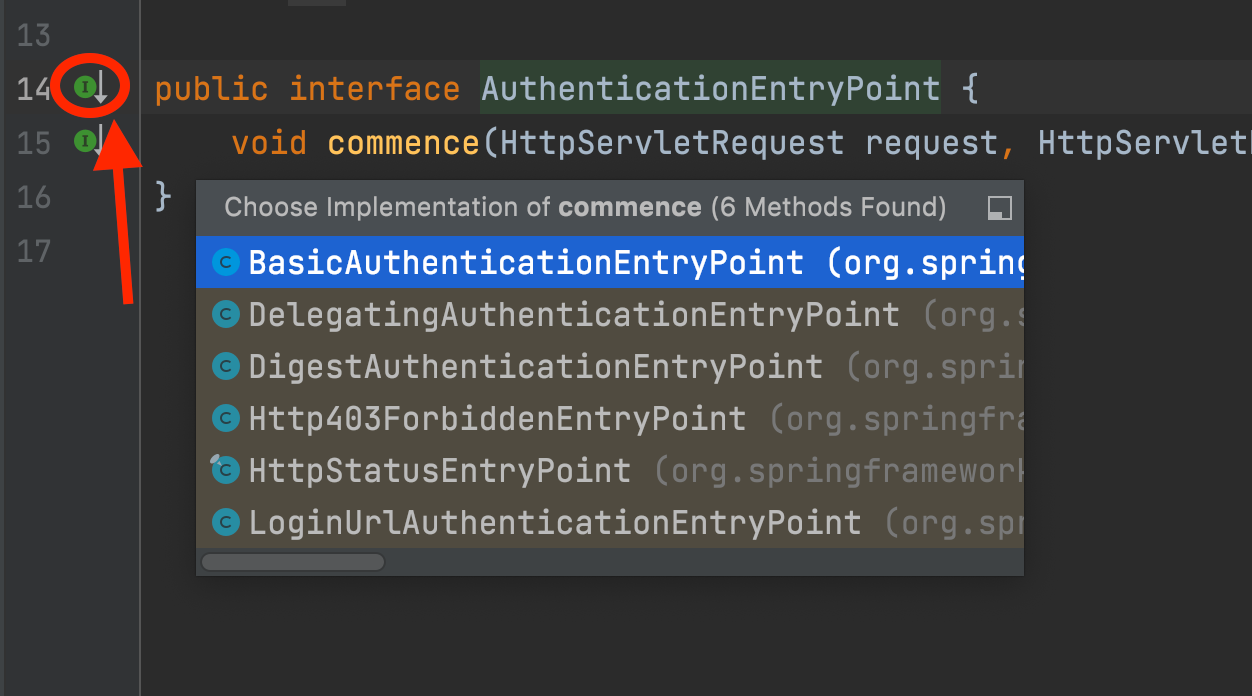
Let's see available implementations for this interface in Spring Security.
Press Shift twice to open the Search Everywhere window in Intellij IDEA and type AuthenticationEntryPoint, then press Enter to open it. Next, press green I button next to the interface definition, as you see in the image below. This will show you list of default implementations for this interface.
Okay, next one...
What is AccessDecisionHandler?
AccessDecisionHandler is called when client is authenticated but not authorized to access given resource. Here, I add a screenshot of source code for this class. As you can see, there is not much happening except returning 403 HTTP code back to client.

Okay, so you understand how Spring Security behaves in case of rejection. However, you might need custom implementations for both cases.
Let's check how it is done.
Custom AuthenticationEntryPoint and AccessDeniedHandler
In the code below, you can see how you can create custom implementations. I added header to let client know why their request is rejected, so client know what to do next.
@Component
class CustomAccessDeniedHandler implements AccessDeniedHandler {

    @Override
    public void handle(HttpServletRequest request, HttpServletResponse response,
                       AccessDeniedException exc) throws IOException {
        response.addHeader("access_denied_reason", "not_authorized");
        response.sendError(403, "Access Denied");
    }
}

@Component
class CustomAuthenticationEntryPoint implements AuthenticationEntryPoint {
    @Override
    public void commence(HttpServletRequest request, HttpServletResponse response,
                         AuthenticationException authException) throws IOException {
        response.addHeader("access_denied_reason", "authentication_required");
        response.sendError(403, "Access Denied");
    }
}
and finally, you need to let Spring Security know these implementations. You add .accessDeniedHandler() and .authenticationEntryPoint() after .exceptionHandling() configuration method.
@Override
    protected void configure(HttpSecurity http) throws Exception {
        http.authorizeRequests().antMatchers("/user/**").hasRole("USER")
            // only ROLE_ADMIN can access to /admin/** endpoint pattern
            .and().authorizeRequests().antMatchers("/admin/**").hasRole("ADMIN")
            // defining exception handling
            .and().exceptionHandling()
            // setting custom access denied handler for not authorized request
            .accessDeniedHandler(new CustomAccessDeniedHandler())
            // setting custom entry point for unauthenticated request
            .authenticationEntryPoint(new CustomAuthenticationEntryPoint())
            // setting stateless session, because we choose to implement Rest API
            .and().sessionManagement()
            .sessionCreationPolicy(SessionCreationPolicy.STATELESS);
    }
Conclusion
In these days, you mostly develop REST APIs and securing these applications are crucial. In this article, I showed how you can develop against access denied scenario.
If you would like to see a sample project for exception handling flow, please visit this repo. The code samples I shared in this article are available in this repo as well.
 ugurcanlacin
Member discussion